Getting Started with Java Programming
Java is one of the most popular and powerful programming languages.
Java is a high-level, object-oriented programming language developed by Sun Microsystems in 1995. In this article, we will learn how to install Java on your computer.
You can run Java Programs using the following two methods:
- Install Java On Your Computer
- Or Run Java Online (Using Online Compiler)
Install Java on Your Computer
Now, we will learn to install Java on your computer. This step-by-step process will guide you to install Java on the following operating systems: Windows, macOS, and Linux(Ubuntu).
Steps to install Java on Windows OS:
- Download and install JDK(Java Development Kit)
- Configure Environment Variables on your system
- Verify Installation Using the Command Prompt
Step 1: Download and install JDK on your PC
First, go to the official website of Oracle and download the latest JDK.
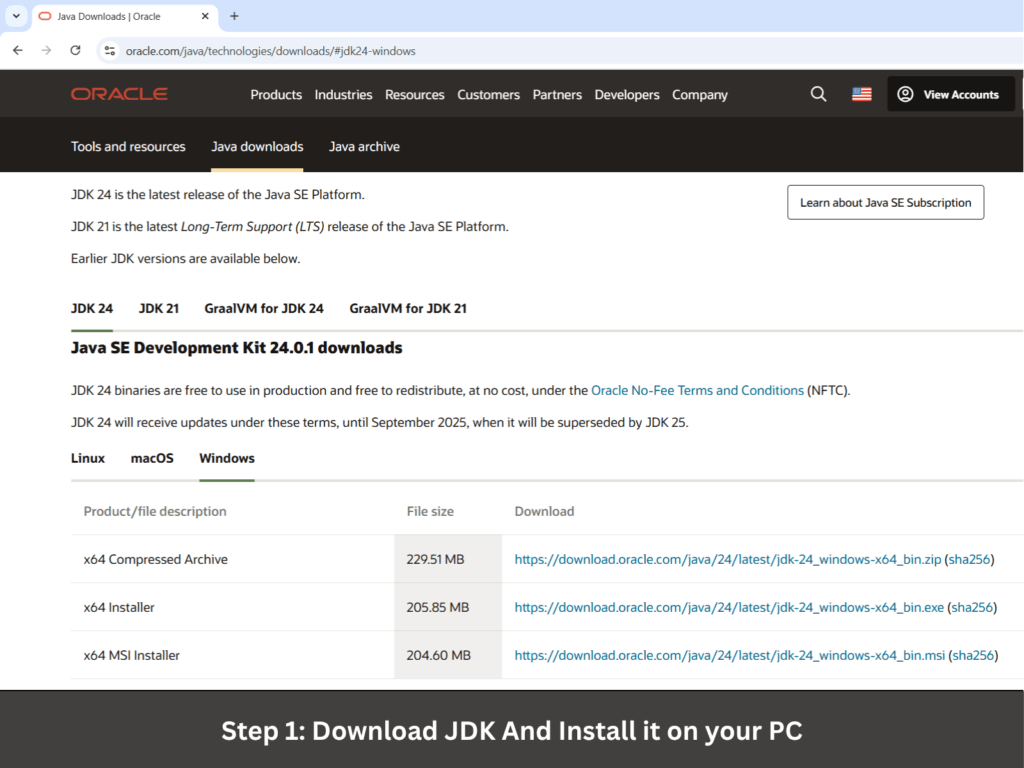
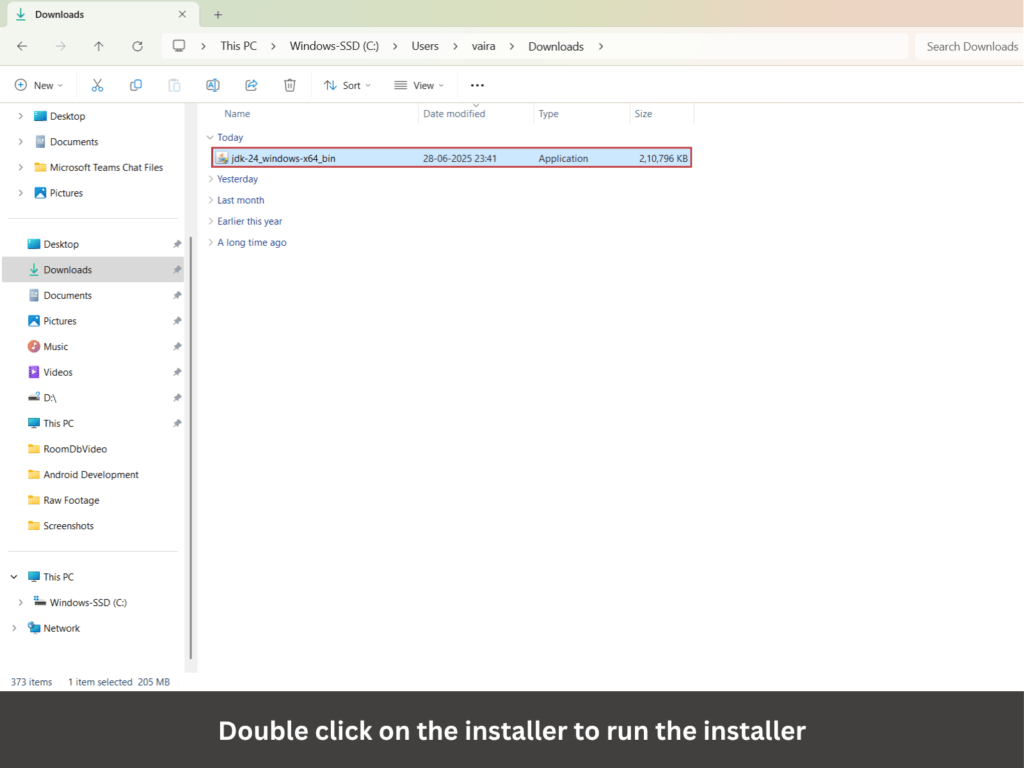
Now, choose x64 MSI Installer or x64 Installer on the Windows tab and click on the download link. Now, go to your downloads folder and double-click on that downloaded JDK file as shown in the image below:
So now the Java Installation Wizard opens, and you will be prompted to the screen below.
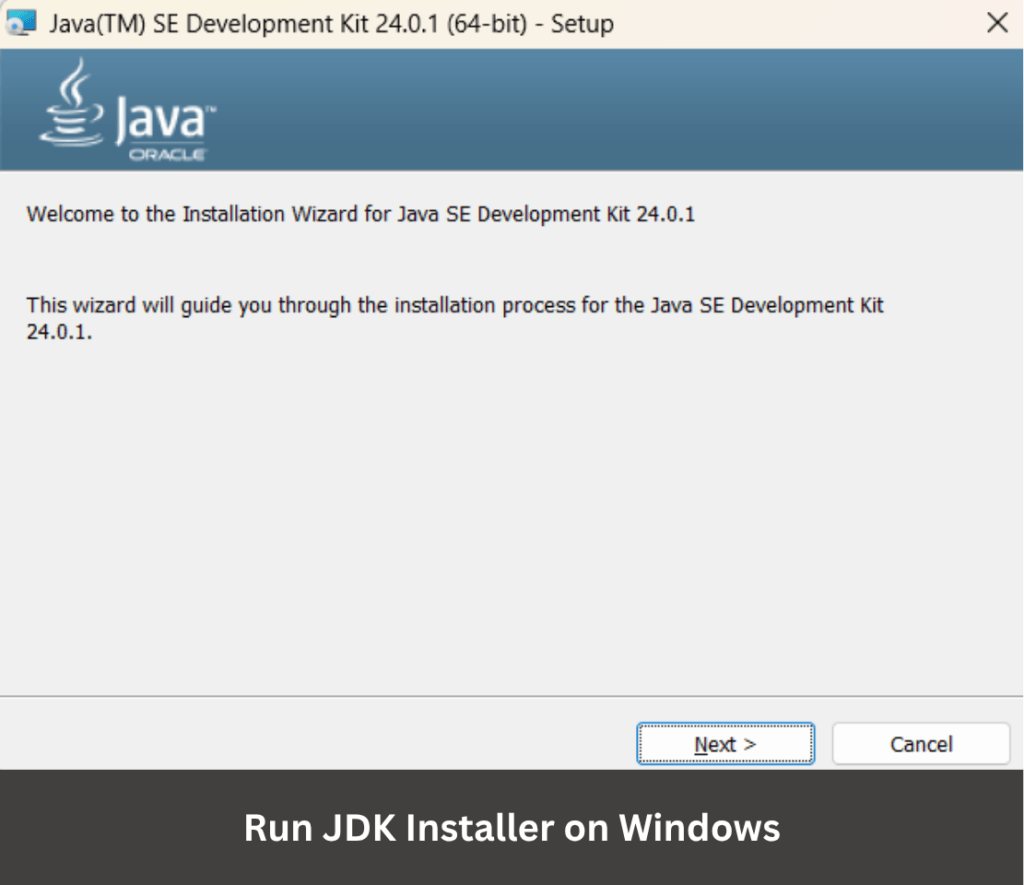
Click next, and you will be prompted to the screen as shown below.
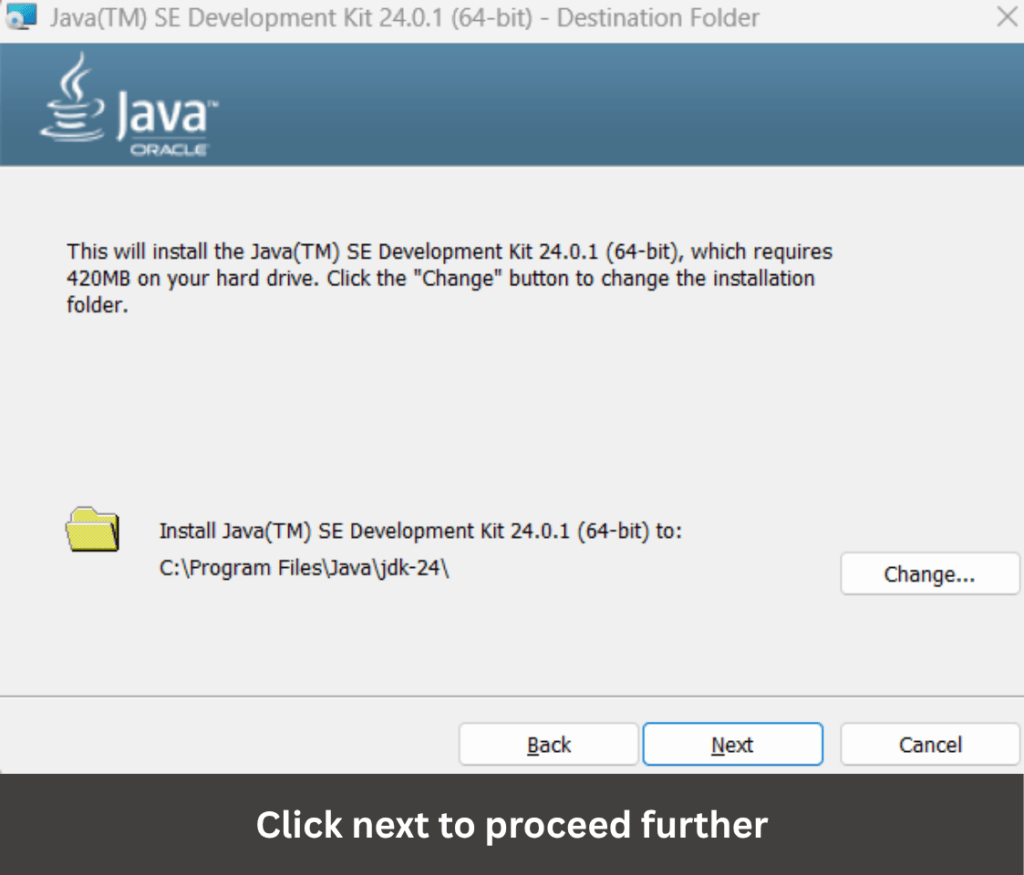
Again, click on the Next button to install JDK, and the installation will begin as shown below.
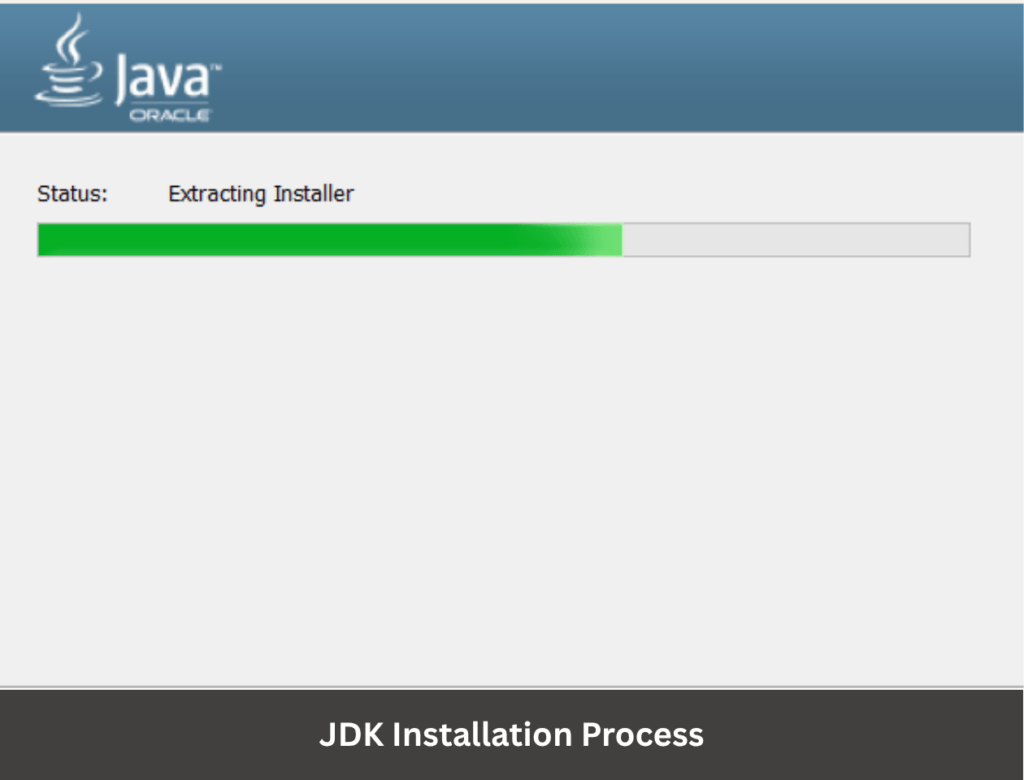
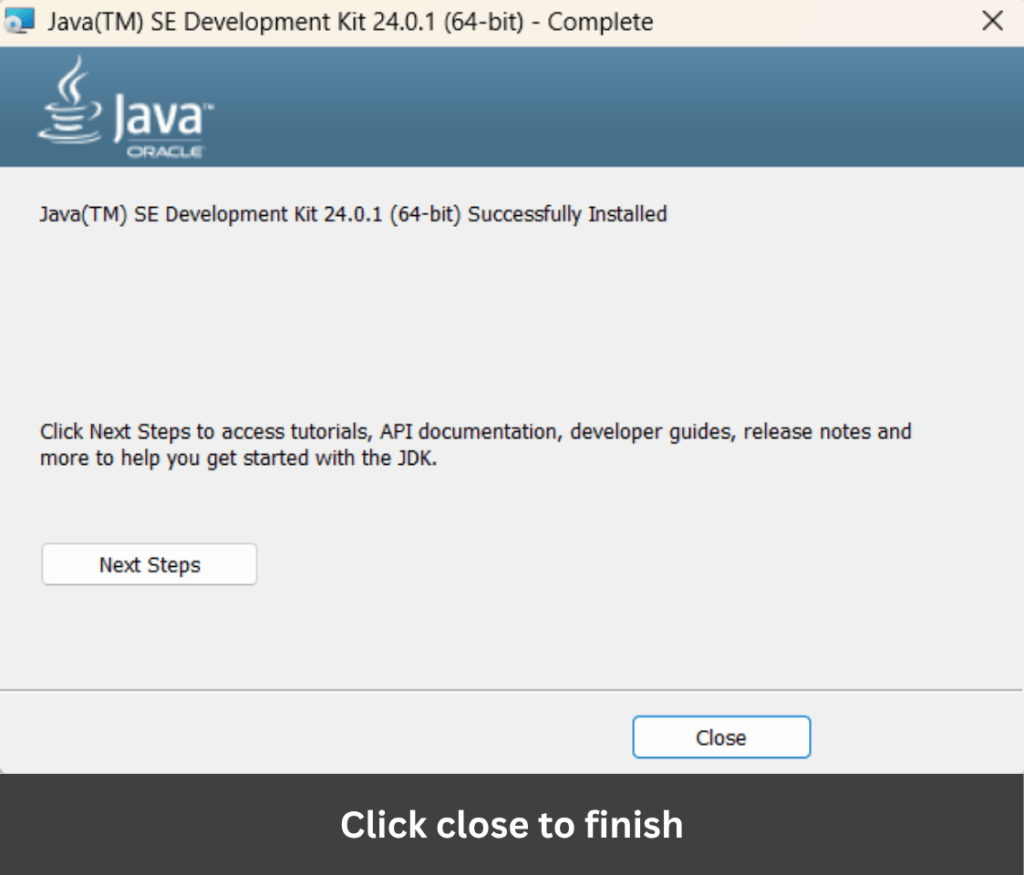
After installation is completed, as shown below. Click close to finish.
Step 2: Configure Environment Variable
After installation is completed, you need to set the environment variable to tell your system where to find Java. To set an environment variable, first, you need to locate the JDK Path. Normally, it is located at
C:\Program Files\Java\jdk-24\bin
Copy this path and search for an environment variable in your search bar as shown in the image below.
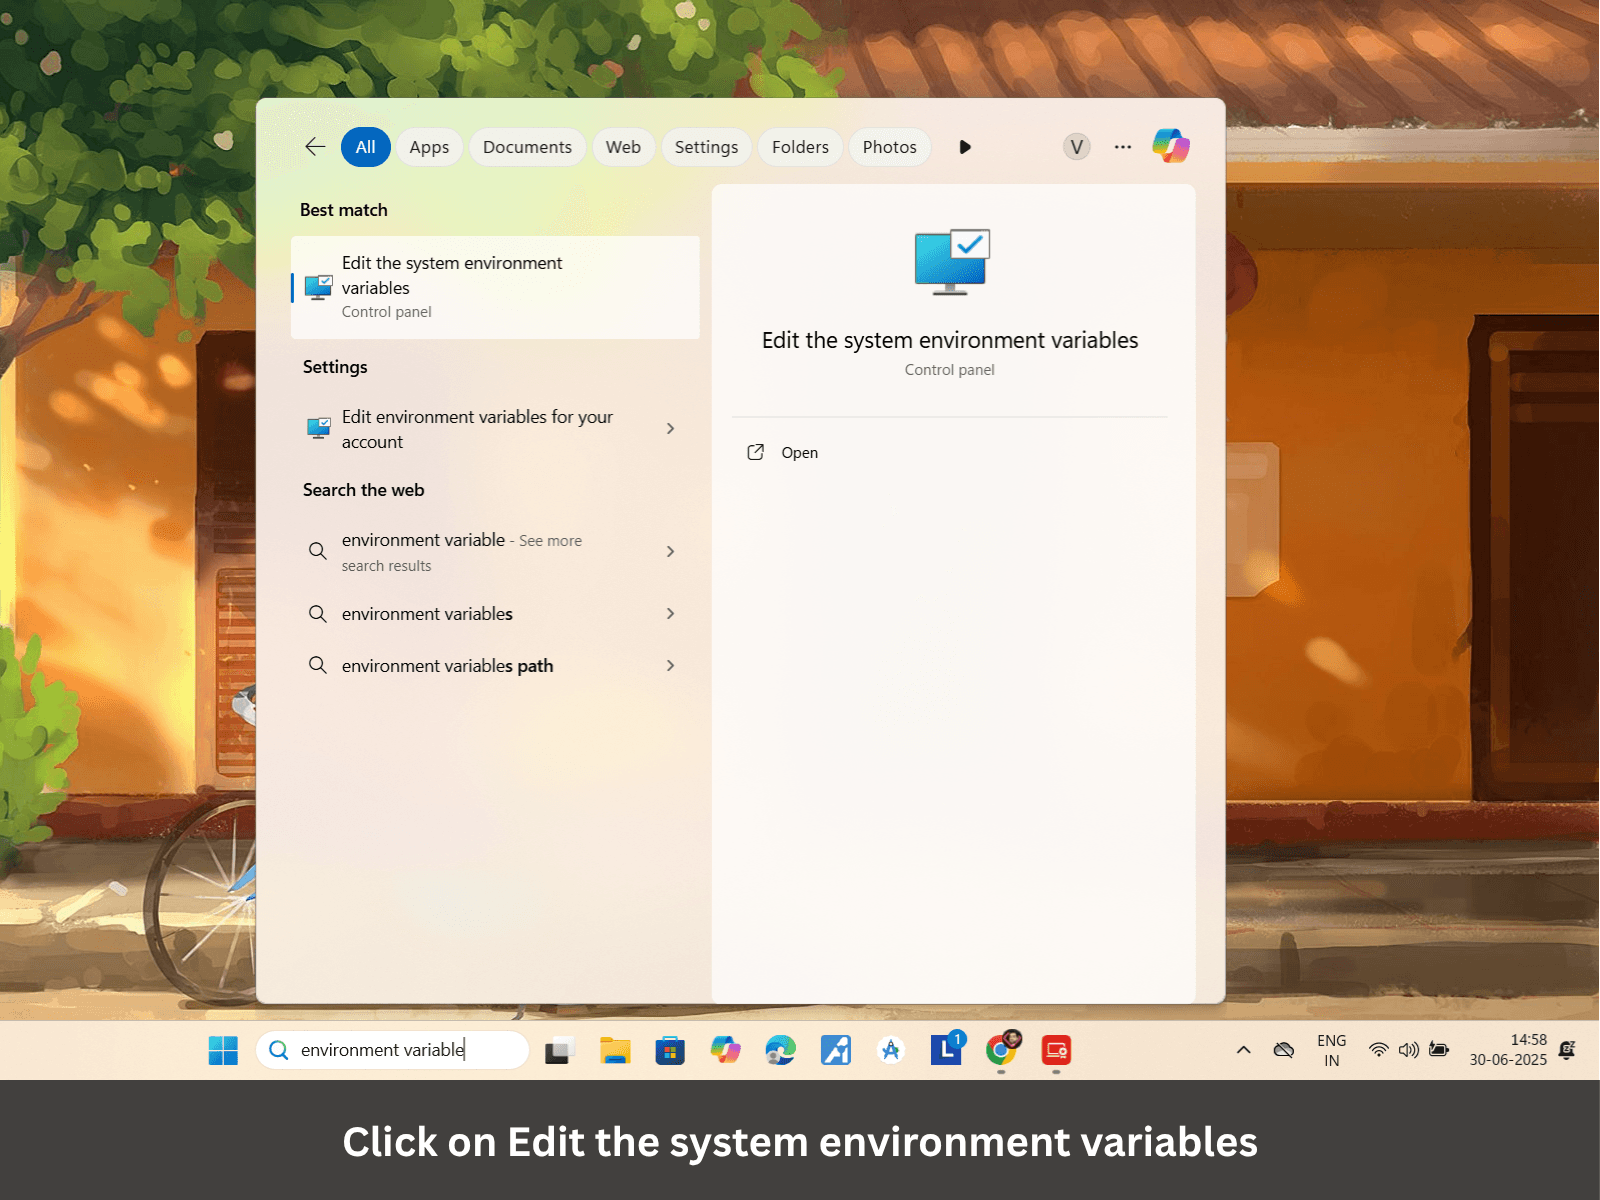
Now, click on Edit the system environment variables to set environment variables for your system. When you click on Edit the system environment variables, the next screen will open as shown in the image below.
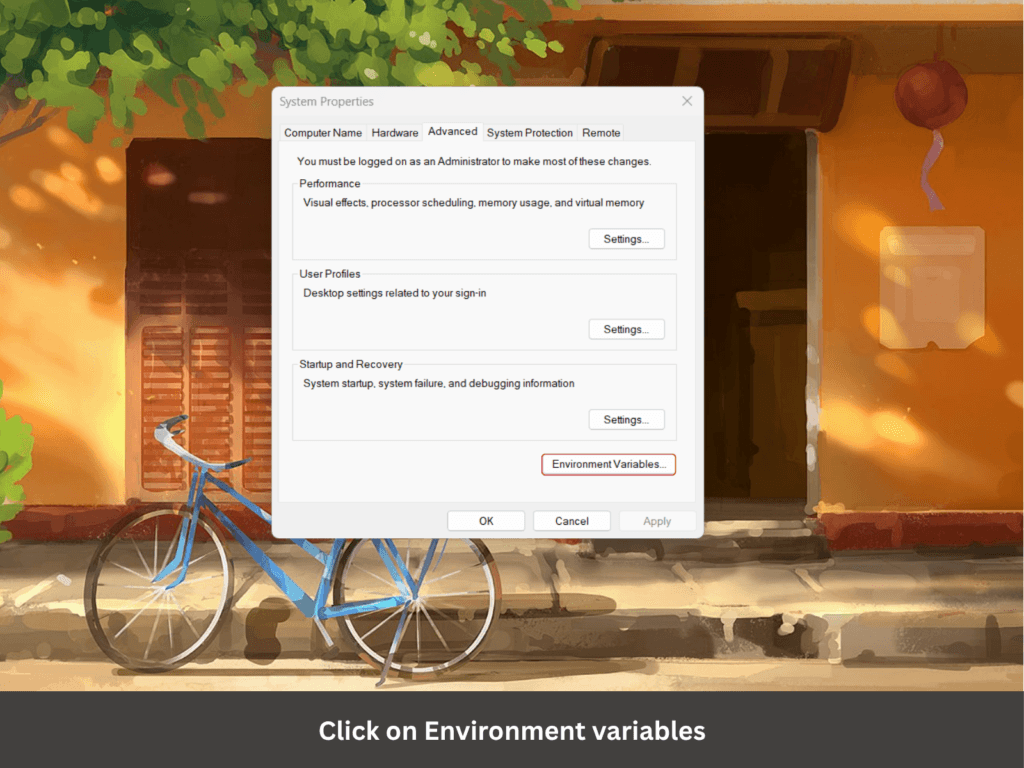
On this tab, click on Environment variables, and you will be prompted to the screen below. Under this tab, we will first create JAVA_HOME variable. To do that, click on New under System variables to create a new variable, as shown in the image below.
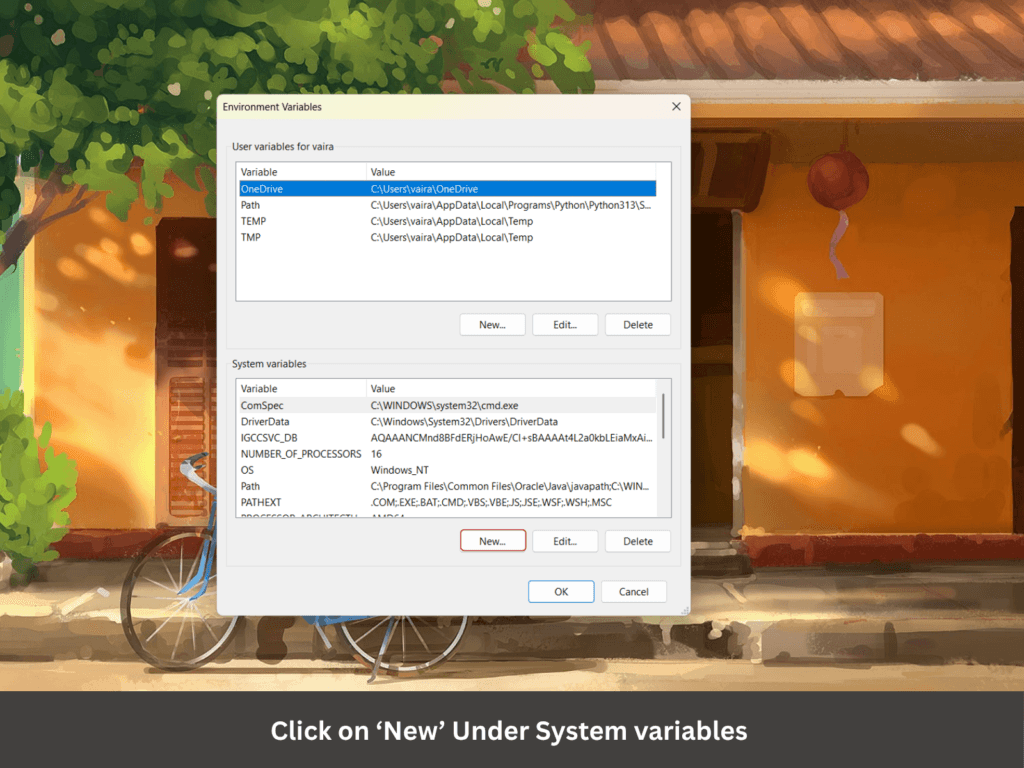
When you click on New, the next screen will open as shown in the image below.
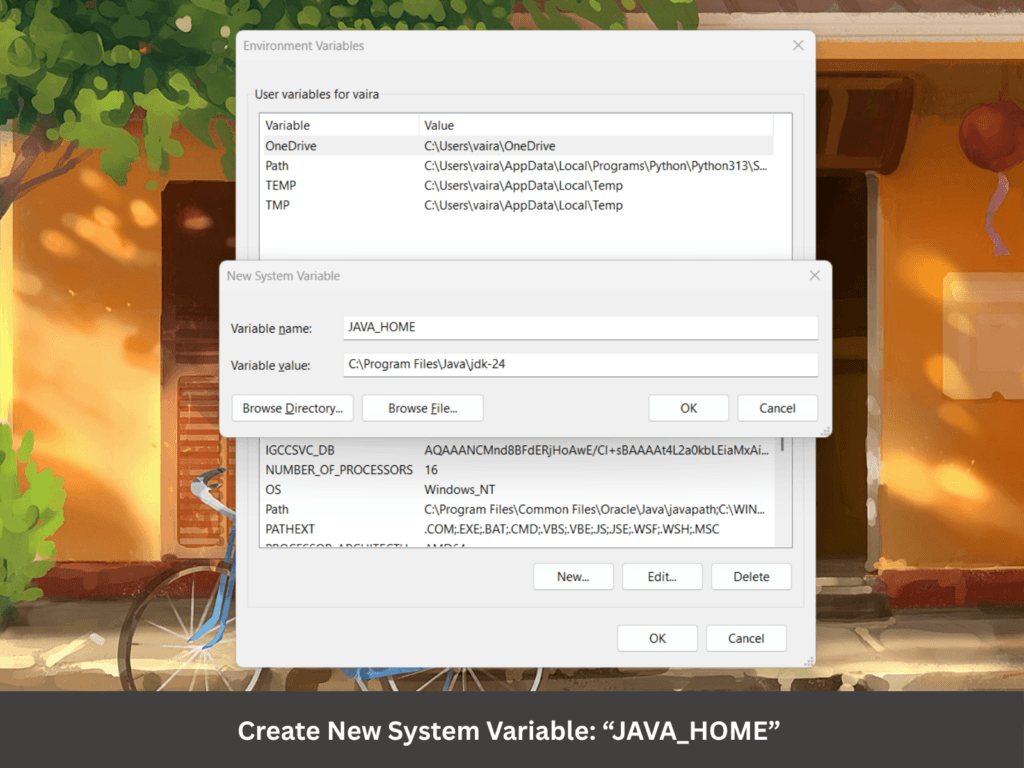
Under this tab, we will create our variable. Here, name the variable JAVA_HOME and set its value to the path of the JDK folder directory (i.e., C:\Program Files\Java\jdk-24), and then click ok to create a new system variable (JAVA_HOME).
Now we have completed our first step to create our new system variable (JAVA_HOME).
Second step is to update the path variable. To update the path variable, find the path variable under the System variables section, and click on Edit. Then, click New and paste your JDK bin path (i.e., C:\Program Files\Java\jdk-24) as shown in the image below.
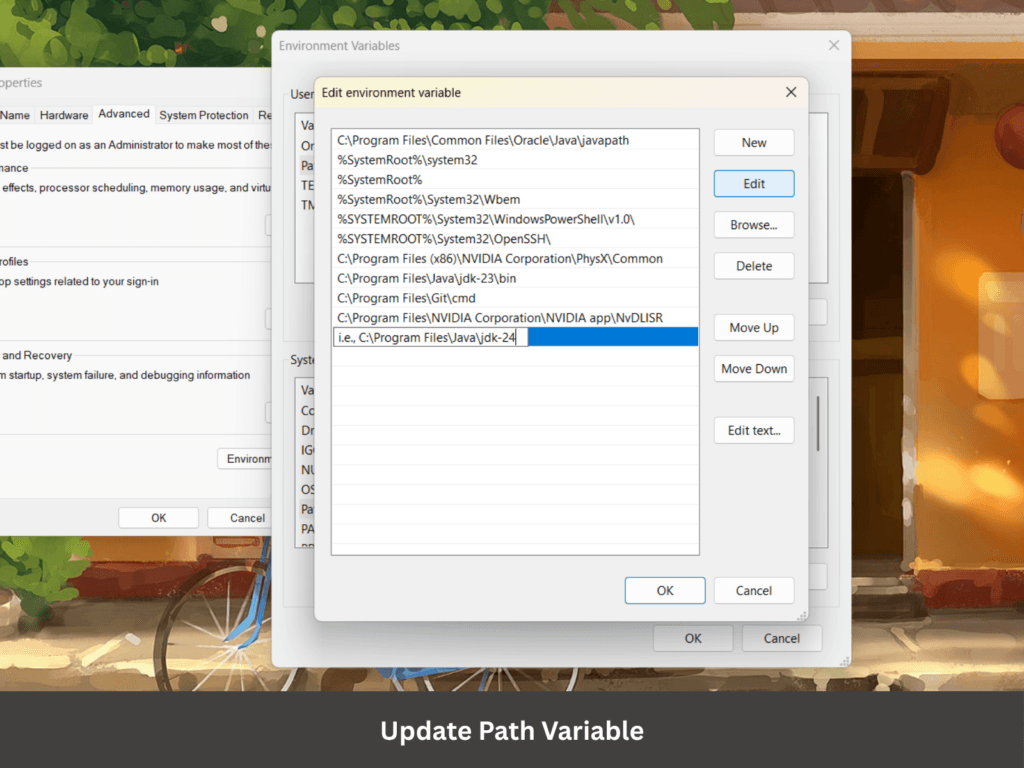
Finally, click ‘ok’ to update the path variable.
Step 3: Verify your Installation
After installation and configuration, you can verify whether Java is installed by using the following command in the command prompt.
java --version
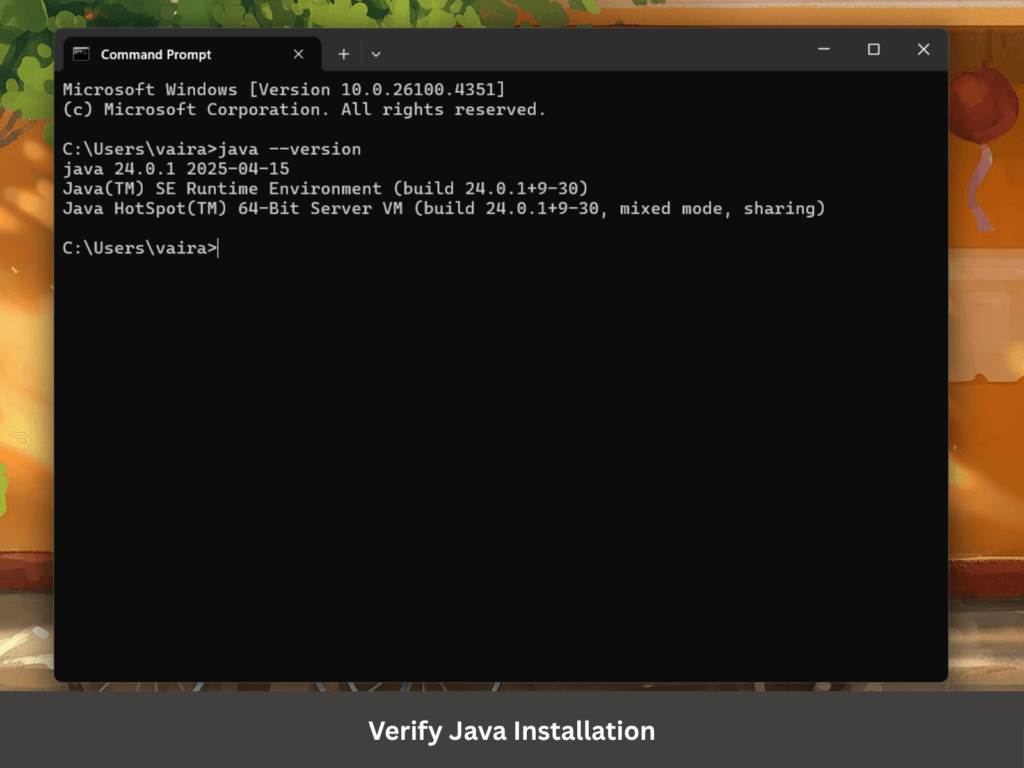
If Java is installed successfully, it will print the version information; otherwise, it will produce an error message indicating that the command is not recognized.
Steps to install Java on Linux OS:
- Check if Java is Already Installed
- Install Java
- Verify Installation
Step 1: Check if Java is Already Installed
Since Linux often comes with OpenJDK pre-installed, especially on developer-friendly distros like Ubuntu or Fedora. So first, we have to check if Java is already installed or not.
To check if Java is installed or not, open your terminal and run the following command:
java -version
If Java is installed, you’ll see the version information and can skip the remaining steps. Otherwise, follow the steps below.
Step 2: Install Java
First, update your package to ensure you will get the latest version of the software.
For Debian/Ubuntu-based distros:
sudo apt update
For Fedora/RHEL-based distros:
sudo dnf update
For Arch-based distros:
sudo pacman -Syu
Now, install JDK with:
For Ubuntu/Debian-based Distributions:
sudo apt install default-jdk
For Fedora/RHEL/CentOS:
sudo dnf install java-latest-openjdk
For Arch Linux / Manjaro:
sudo pacman -S jdk-openjdk
Step 3: Verify Installation
Check if Java is installed:
					java -version
javac -version
If Java is installed successfully, it will print the version information; otherwise, it will produce an error message indicating that the command is not recognized.
Steps to install Java on MacOS:
- Check if Java is Already Installed
- Download and install JDK(Java Development Kit)
- Configure Environment Variables on your system
- Verify Installation
Step 1: Check if Java is Already Installed
Since older versions of macOS may come with Java pre-installed on it. So first, we need to check if Java is already installed or not.
To check if Java is installed or not, open your terminal and run the following command:
java --version
If Java is installed, you’ll see the version information and can skip the remaining steps. Otherwise, follow the steps below.
Step 2: Download and Install JDK
First, go to the official website of Oracle and download the latest JDK for MacOS.
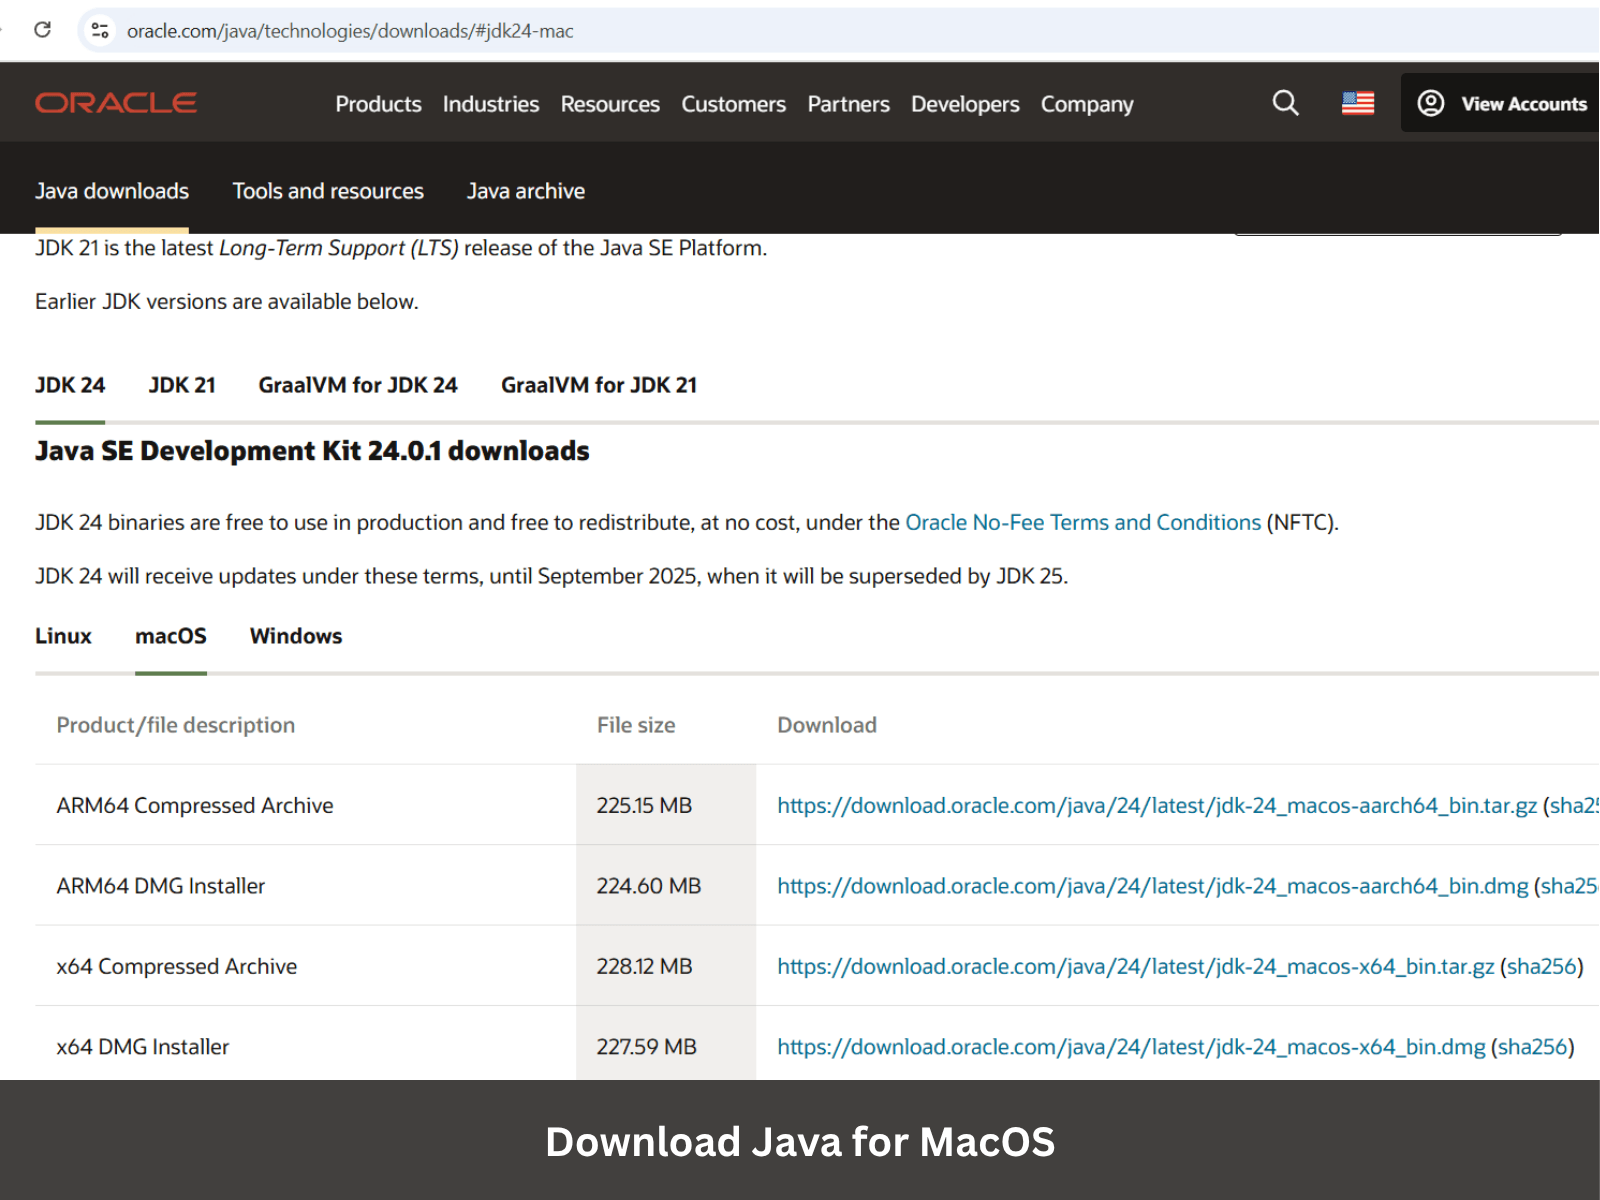
Select the appropriate Java installer depending on your Mac’s chip architecture:
For Intel (x86_64) Macs:
Download the x64 DMG installer:
Oracle JDK x64
For Apple Silicon (ARM64) Macs:
Download the ARM64 DMG installer:
Oracle JDK ARM64 DMG
Once you have successfully downloaded the installer, run the installer and you will be prompted to the screen below.
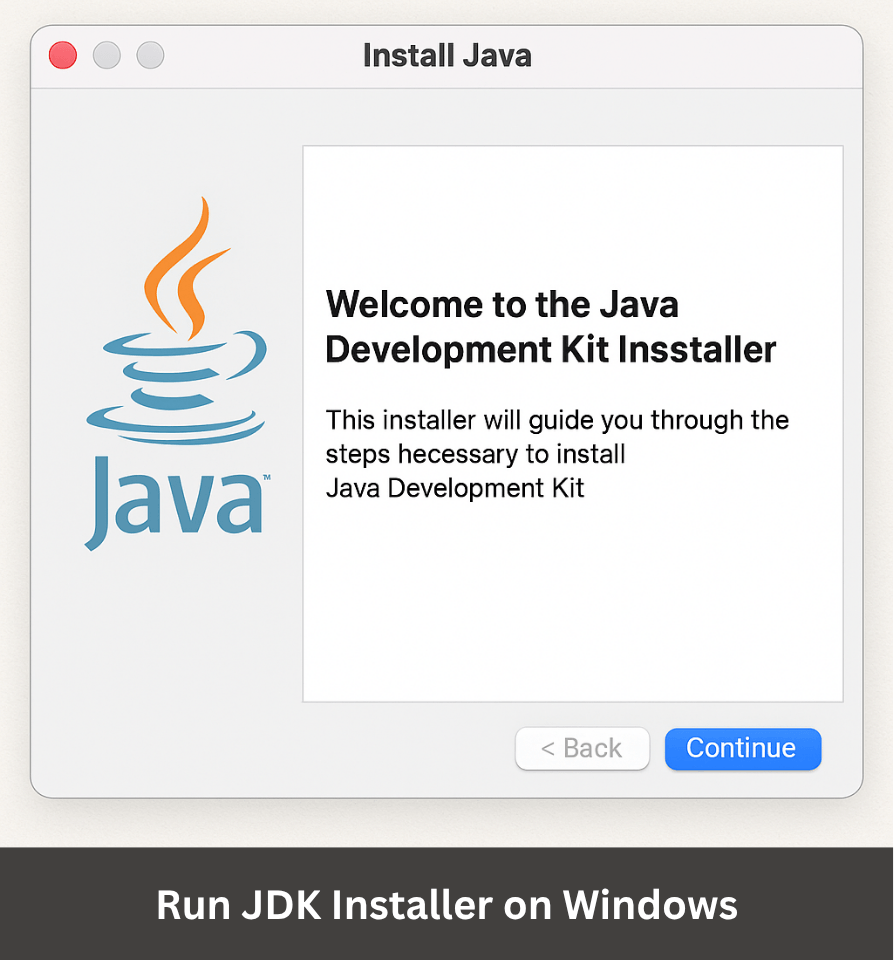
Follow the on-screen instructions to initiate the installation process.
Click the Continue button -> select destination -> install -> Enter your password to give permission to install Java.
Step 3: Configure Environment Variable
After installation is completed, you need to set the environment variable to tell your system where to find Java. To set an environment variable, first, open the Terminal app and type the following command:
nano ~/.bash_profile
This will open the .bash_profile file in a text editor.
Now, add the following lines at the end of the file to set the JAVA_HOME variable.
					export JAVA_HOME=$(/usr/libexec/java_home)
export PATH=$JAVA_HOME/bin:$PATH
Press Ctrl + X to exit, then Y to save the changes, and Enter to confirm the filename. Close and reopen the terminal for the changes to take effect.
Step 4: Verify your Installation
In Terminal, run the following command to verify whether Java is installed successfully:
java -version
If Java is installed successfully, it will print the version information; otherwise, it will produce an error message indicating that the command is not recognized.
Run Your First Java Program
Open Notepad (or any editor you prefer) and enter the following code in the new file.
					public class HelloWorld {
    public static void main(String[] args) {
        System.out.println("Hello, Java!");
    }
}
Then save this file as HelloWorld.java.
Now, use the following command in the command prompt to compile the code: javac. First, navigate to the location of that program and run the command as shown below.
javac HelloWorld.java
Then, execute your program with
java HelloWorld
Output:
Hello, Java!
Run Java Online
You can also run Java online using an online Java compiler. If you want to start immediately, you can use a free online Java compiler.
An online compiler helps you write code directly in the browser without installing Java.
Conclusion
Getting started with Java may seem intimidating at first, but once you’ve installed the JDK, set up your environment, and run your first program, you’re well on your way to becoming a Java developer. Java’s simplicity, portability, and massive ecosystem make it an ideal language for both beginners and professionals.
Whether you’re aiming to build desktop applications, Android apps, or enterprise-level software, Java provides a strong foundation. Keep practicing, experiment with small projects, and explore Java’s powerful features like object-oriented programming, data structures, and frameworks.
This is just the beginning — stay curious, and happy coding!!!


